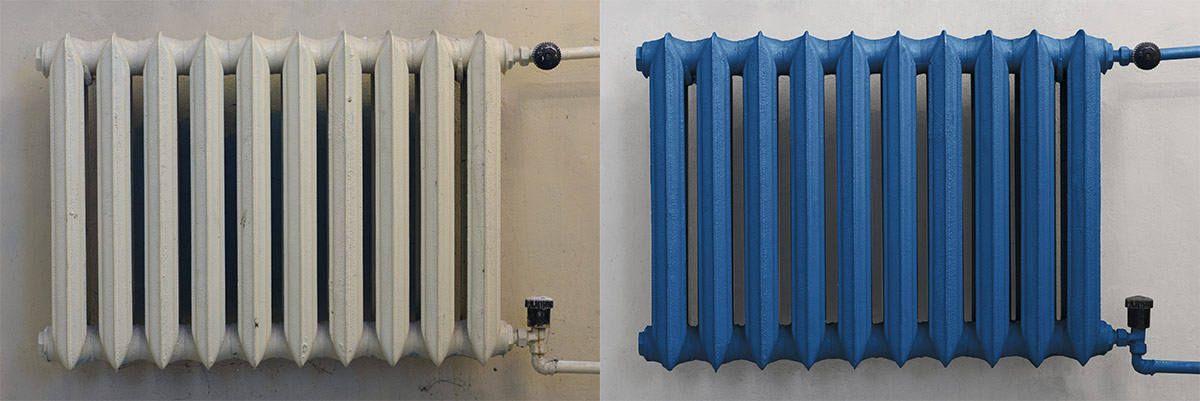
Painting a radiator can be a great way to change the look of the room and add some style to what is otherwise an overlooked part of the house. This guide will take you step-by-step through painting your radiator, whether you want it to match your walls or make it a feature piece. Follow these instructions to achieve a professional finish.
Preparing Your Workspace
Gather Your Materials
Ensure that you have everything that you require before beginning. Here are some things you will need:
- Radiator paint (heat-resistant)
- Primer (suitable for metal surfaces)
- Paintbrushes (various sizes)
- Sandpaper (medium and fine grit)
- Wire brush
- Painter's tape
- Dust Sheets or old newspaper
- Cleaning supplies (soap, water, and a clean cloth)
Safety Precautions
Always prioritize safety. Make sure that the radiator has been switched off and it is cool enough to touch before beginning painting. Open windows or use fans to ensure there is good ventilation because inhaling paint fumes can be dangerous.
Cleaning and Sanding
Cleaning the Radiator
Start by cleaning up the whole radiator very well. Dust, dirt and grease may hinder the proper adhesion of the paint. Use mild soap on a damp sponge to wipe down the entire surface. Pay special attention to crevices and hard-to-reach areas.
Sanding the Surface
Sand lightly using medium grit paper once your radiator is clean and dry which helps in better adhesion of primer and paint too. If there are any rust spots, use a wire brush to remove them. After which wipe over with a clean damp cloth after sanding to get rid of dust particles to ensure a smooth finish.
Applying Primer
Choosing the Right Primer
Identify a primer meant for metal surfaces that can withstand high temperatures. Applying primer is crucial for achieving a smooth, durable finish.
Priming the Radiator
Lay down a dust sheet or old newspapers on the floor so as not to dirty it. Painter’s tape is good for covering areas that should not be painted like the wall edges or valve connections. Use masking tape with newspaper to mask off larger areas to protect walls.
Apply the primer using a brush, beginning from the hard-to-reach spots and then work your way around to larger flatter surfaces. Ensure that you cover all parts of the radiator uniformly. Watch for corners to make sure there isn’t a build-up of paint, that can cause drips.Let dry as stated by the manufacturer instructions, usually 24 hours.
Painting the Radiator
Choosing the Right Paint
When choosing paint, opt for one that is specifically designed for radiators or high-heat environments. Such paints do not change colour nor peel off when subjected to extremely high temperatures as in the case of radiator paints.
Painting Technique
Start by applying a thin, even coat of paint with a brush. Use smaller brushes for detailed areas and larger brushes for broad surfaces. Apply smooth strokes of paint on it so that no drips or marks are left behind. Give enough time before doing the second coating to ensure the first one has dried fully; usually after about six to eight hours but check drying times on the tin.
Finishing Touches
Inspecting and Touching Up
Look at the radiator once more after drying completely to check whether there are any missed spots or irregularities requiring more painting.
Removing Painter’s Tape
Before the final coat dries completely carefully remove the painter’s tape ensuring nice clean lines without peeling away wet paint.
Reinstalling and Enjoying
Reconnecting the Radiator
After thoroughly drying up, if you had removed your radiator while painting, re-install it ensuring all connections are tight with no leakages occurring again.
Enjoy The New Look of Your Radiator
Turn on the radiator and enjoy the refreshed look it brings to your space. Not only have you given your room a facelift, but you’ve also protected the radiator from rust and wear.
Maintenance Tips
Ensure that your painted radiator is always clean by wiping it gently using a soft, wet cloth. Don’t use any corrosive agents since they can spoil the paintwork. If there are any chips or scratches on it, paint over them as soon as possible so that rust does not set in.
By simply following these steps, you will be able to successfully paint your radiator and enhance the general appearance of your room. Happy decorating!
What colors can be used to paint radiators?
The color possibilities are endless, and they significantly impact the look of your room when painting radiators. In the past, white was always a common choice for radiator paint so that it could blend perfectly with the walls. However, contemporary design has broadened the range of available colors for radiators: now you can choose whether to combine them with or contrast them against other room decors.
Neutral & Subtle Colours
For those who like their things understated, shades of grey, beige and white are still top options. These will help make your radiator become background noise in any room making everything look consistent and nonintrusive. Soft greys or creamy whites among other light neutrals are particularly effective in contemporary and minimalist interiors where keeping things clean and simple is important.
Bright & Bold Colors
If you’re looking to create a focal point in a room using your radiator as a central piece, then bold and vibrant colors will do just that. A radiator can be transformed into an eye-catching feature by choosing colors like deep blues, vibrant yellows or rich greens. For example, a bright yellow radiator might add some happy brightness into space while a deep blue could make it more sophisticated in appearance. Vibrant green tones especially within modern or eclectic spaces can bring in some freshness.
Coordinated Colours
A popular trend is to have radiators painted with colours that either match or complement the surrounding decor. For instance, if you paint a radiator the same colour as the wall itself then it will look very much part of one integrated whole thing which flows throughout each other seamlessly. Conversely using contrasting colours would highlight it as being part of the overall design scheme instead. This strategy allows for individual creativity plus may be modified according to various interior styles- from vintage or classical all the way up to modernistic and industrial.
To sum it all up, the choice of color for a radiator generally depends on the desired aesthetic as well as how you want it to be involved in your room’s design. Therefore, a proper color choice can improve both the functionality and appearance of your radiator in particular. Whether you would prefer them to blend harmoniously with their surroundings or truly stand out, there is certainly a right shade.
FAQs on Regarding Radiator Painting
Yes, you can paint straight onto a radiator, but for the best results, it's important to follow some preparatory steps. Clean the radiator thoroughly to remove any dust, dirt, and grease. Lightly sand the surface to create a rough texture for the paint to adhere better. Finally, apply a coat of metal primer before painting to ensure a smooth, long-lasting finish.
Yes, painting radiators can be a good idea for several reasons. It can improve the appearance of old or worn radiators, allowing them to blend seamlessly with your room’s decor. Painting can also protect the radiator’s surface from rust and corrosion. However, it's important to use the right type of paint, typically a heat-resistant radiator paint, to ensure the finish withstands high temperatures and doesn't crack or peel.
Radiators can be painted in either gloss or satin finishes, depending on your preference and the look you want to achieve:
- Gloss: A gloss finish provides a shiny, reflective surface that is easy to clean and highly durable. It can make the radiator stand out as a feature in the room.
- Satin: A satin finish offers a more subdued, matte appearance that can blend in more subtly with the room's decor while still being durable and easy to clean.
Both finishes are suitable for radiators, but satin is often preferred for a more modern and understated look, while gloss is chosen for a more traditional or bold aesthetic.
After painting a radiator, it's important to allow the paint to cure properly before turning it on. Generally, you should wait at least 24 hours before turning the radiator back on. However, this can vary depending on the type of paint used. Always check the manufacturer's instructions on the paint can for the recommended drying and curing times. Turning the radiator on too soon can cause the paint to blister or not adhere properly.
The most efficient color for a radiator, in terms of heat emission, is actually matt black. Black surfaces are better at absorbing and emitting heat compared to lighter colors. However, the difference in heat emission between a black radiator and one painted in a typical light color is relatively small and often not significant enough to influence the choice of color for aesthetic reasons. Therefore, you can choose a color that best fits your decor without worrying too much about efficiency.
When painting a radiator, you can use both a roller and a brush to achieve the best results:
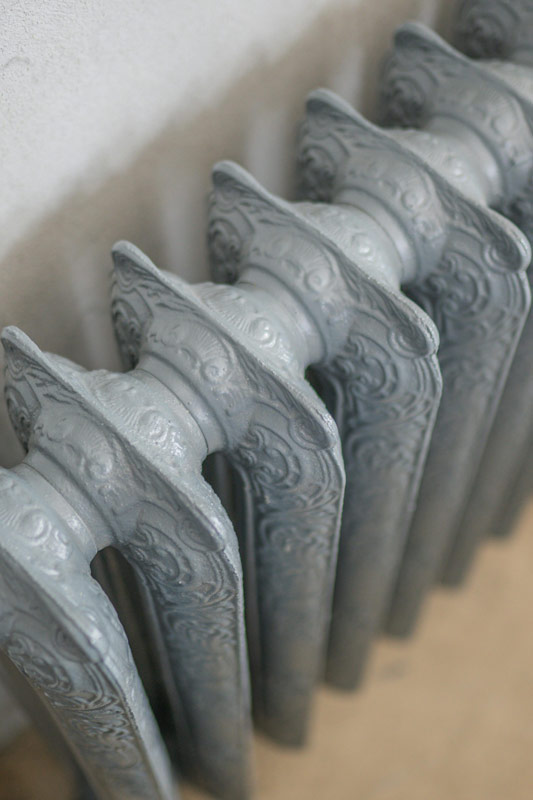
- Brush: A brush is useful for reaching difficult areas, such as the spaces between the radiator's columns or the intricate details on older radiators. A small, angled brush can provide more precision and better coverage in these tight spots.
- Roller: A small foam roller is ideal for painting the larger, flat surfaces of the radiator. It can help apply an even coat of paint quickly and smoothly, reducing brush marks.
Combining both tools can give you a professional-looking finish: use the brush for detailed areas and the roller for broader surfaces.
Paint may not be sticking to your radiator for several reasons:
- Poor Surface Preparation: If the radiator was not properly cleaned and sanded before painting, dirt, grease, or rust could prevent the paint from adhering. Make sure to thoroughly clean the radiator and sand it lightly to create a rough surface for the paint to grip.
- No Primer: Applying a metal primer is crucial for good paint adhesion, especially on a metal surface like a radiator. Without primer, the paint may not stick properly.
- Incorrect Paint Type: Using paint that is not designed for high temperatures or metal surfaces can lead to poor adhesion. Ensure you use a heat-resistant radiator paint or an appropriate metal paint.
- Inadequate Drying Time: If the paint is not given enough time to dry and cure between coats or before turning the radiator on, it may not adhere well. Follow the manufacturer's recommended drying times.
- High Humidity or Temperature: Painting in high humidity or extreme temperatures can affect how well the paint adheres. Aim to paint in a controlled environment with moderate temperature and humidity levels.
Addressing these issues should help ensure that the paint sticks properly to your radiator.
- First Coat: The initial coat should provide a good base layer that adheres well to the primed surface. It helps to cover any bare spots and ensures even coverage.
- Second Coat: The second coat will give the radiator a smooth, finished look and enhance durability, ensuring a consistent color and sheen.
Always allow sufficient drying time between coats, as specified by the paint manufacturer, to ensure the best results. In some cases, if the paint coverage is not adequate after the second coat, a third coat may be applied for a perfect finish.
No, using normal paint on radiators is not recommended. Radiators heat up and cool down frequently, and normal paint may not withstand these temperature changes. Instead, use paint specifically designed for radiators or heat-resistant metal paint. These paints are formulated to endure high temperatures without cracking, peeling, or discoloring, ensuring a durable and long-lasting finish. If normal paint is used, it might not adhere properly and could result in an uneven finish and potential paint failure.
Painting radiators the same color as the walls is a common practice and can create a cohesive and seamless look in the room. This approach helps the radiator blend into the background, making it less noticeable. However, painting the radiator a contrasting color can also be a design choice, turning it into a feature or focal point. Ultimately, the decision depends on your personal preference and the overall aesthetic you want to achieve in the space.
FOR PAINTING AND DECORATING IN LONDON PLEASE CALL OUR FRIENDLY TEAM ON 020 8949 2553

